
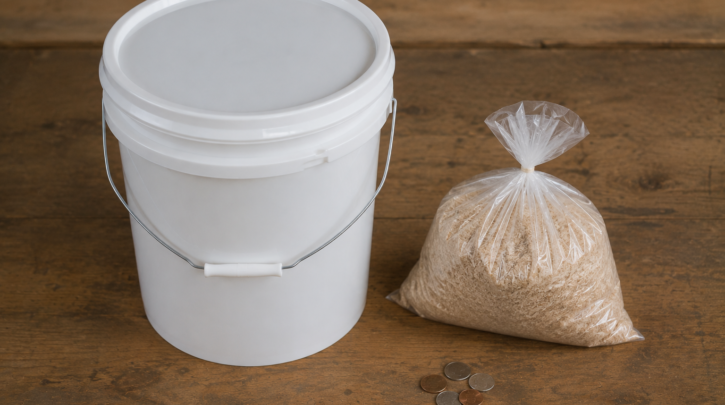

Budget shouldn’t be the reason you don’t try a composting toilet. There’s a genuine path in at nearly every price point, from a $15 bucket setup to a $300 manufactured unit — the right one depends on how much odor-control performance you’re willing to trade for how much money saved.
This page walks through each tier honestly, including where the cheapest options fall short, so you can pick the right starting point for your actual budget rather than assuming the cheapest possible path is automatically the smartest one.
The Four Budget Tiers
| Tier | Approx. Cost | What It Is | Tradeoff |
|---|---|---|---|
| 0: Bare bucket | $15–25 | Bucket, snap-on lid, carbon additive, no urine diversion | Highest odor risk; more of a “camp toilet” than a true composting toilet |
| 1: DIY with homemade diverter | $30–60 | Bucket, homemade diverter from a second bucket, liquids container | Real urine diversion at minimal cost; needs trial and error to fit well |
| 2: DIY with purchased diverter | $100–200 | Bucket, purchased diverter kit, basic vent kit | Reliable diversion and better odor control; still requires assembly |
| 3: Cheapest manufactured | $180–300 | BOXIO, OGO Nomad, or Trobolo WandaGo | No assembly, manufacturer support; smallest capacity in the manufactured category |
Let’s walk through each tier in more detail, since the table above only tells part of the story — the real differences show up in day-to-day experience, not just the price tag.
Tier 0: The Bare Minimum
A 5-gallon bucket, a snap-on lid, and a bag of sawdust or kitty litter — no urine diversion at all. This is the cheapest possible entry point, often under $20 in total, and it genuinely works for very occasional or emergency use. It’s worth being honest about the tradeoff, though: without urine diversion, you’re relying entirely on carbon additive to manage all the moisture from both solids and liquids, which is a much heavier lift than the additive is really designed for. Odor control at this tier is meaningfully worse than any diverting setup, and it’s better thought of as a backup camping toilet than a genuine composting toilet replacement for regular use.
If you’re only ever going to use this tier occasionally — a car camping backup, an emergency preparedness item — it’s a genuinely reasonable choice on its own terms. Where it becomes a poor fit is if someone buys it expecting daily-use performance comparable to a diverting system, then concludes composting toilets in general don’t work well based on this specific, deliberately minimal setup.
Tier 1: DIY With a Homemade Diverter
Adding a homemade urine diverter — built from a second bucket cut into shape, covered in detail in our DIY urine diverter guide — pushes total cost only modestly higher while adding genuine urine diversion, the single biggest factor in odor control covered throughout this site. This is the best value tier for anyone comfortable with basic tools and willing to accept some trial and error getting the diverter’s fit right on the first attempt.
Tier 2: DIY With a Purchased Diverter
Swapping a homemade diverter for a purchased one ($25–$100) removes the trial-and-error risk and gets you a proven, reliable seal on the first attempt. Adding a basic vent kit ($15–$70) on top gives you active ventilation, closing most of the performance gap with a manufactured unit while still costing a fraction of one. This is the tier we’d recommend for most people seriously considering the DIY route rather than just testing the concept cheaply — see our full 5-gallon bucket build guide for the complete parts list and steps.
Tier 3: The Cheapest Manufactured Option
At this point, a manufactured unit starts looking genuinely competitive on price. BOXIO ($180–$230), the OGO Nomad (~$269), and Trobolo’s WandaGo (under $300) all deliver a tested, warrantied product for not much more than a well-equipped DIY build — see our best budget composting toilets under $300 guide for a full comparison. For many people, especially first-timers who don’t want to spend a weekend assembling something themselves, this tier offers the best balance of low cost and low risk.
Financing and Buying Used
If even Tier 3’s price feels out of reach right now, two more options are worth considering before defaulting to the lowest DIY tier out of necessity rather than preference. Several retailers offer buy-now-pay-later financing on manufactured units, which can make a Tier 3 or even mid-tier unit accessible without the full cost upfront — worth checking if the ongoing performance and support benefits matter enough to you to justify a small financing cost. Buying a used manufactured unit, through van life and RV marketplaces or general classifieds, can also land you a premium unit at a Tier 3 price point, provided you inspect it carefully for wear on seals, fans, and the diverter mechanism before buying.
When inspecting a used unit, ask specifically about the fan’s condition and run time, check the diverter and seals for cracking, and — if possible — ask to see it running before finalizing a purchase. A used premium unit in good condition can be a genuinely excellent value, since the core urine-diversion and composting mechanism doesn’t wear out the way a car engine does; it’s really only the fan and seals that see meaningful wear over years of use.
Which Tier Is Actually Right for You
- Absolute lowest cost, occasional emergency backup only: Tier 0
- Comfortable with basic tools, want real diversion cheaply: Tier 1
- Want a reliable DIY build without reinventing the diverter: Tier 2
- Don’t want to build anything, want a warranty: Tier 3
What Doesn’t Change Regardless of Tier
No matter which budget tier you start at, the same fundamentals apply: urine diversion is the single biggest lever for odor control, consistent carbon additive matters more than which specific material you choose, and active ventilation — even a $15 fan — outperforms a purely passive setup. If your budget only stretches to one upgrade beyond the absolute bare minimum, make it urine diversion first; it does more for day-to-day experience than any other single change covered on this page.
Budgeting for the First Month, Not Just Day One
Whichever tier you choose, budget a small amount beyond the initial purchase for your first month of ongoing costs — a first restock of carbon additive, a few replacement liner bags, and cleaning supplies like vinegar. None of this adds up to much, typically under $20–30 for a first month regardless of tier, but it’s worth planning for upfront rather than being caught short a few weeks in when your initial supply runs out and you’re scrambling to restock mid-trip or mid-week.
Whatever tier you land on, the full parts breakdown in our composting toilet parts list gives you a complete, itemized shopping list so nothing gets missed between your first purchase and your first month of actual use.
Related Guides
Frequently Asked Questions
Is it worth starting at Tier 0 just to test the concept?
It can give you a sense of the basic routine, but because it skips urine diversion, it won’t give you an accurate picture of how a properly diverting composting toilet actually performs on odor — you’re likely to come away with a worse impression than the technology deserves.
Can I start cheap and upgrade later without wasting money?
Yes — a bucket and lid bought for Tier 0 or Tier 1 remain useful even if you later add a purchased diverter or vent kit, so very little of your initial spending is wasted if you decide to upgrade within the DIY tiers.
Is Tier 3 actually cheaper than Tier 2 once you account for time?
Often close to it, once you value your own build time at all — a manufactured Tier 3 unit needs zero assembly time and comes with a warranty, while Tier 2 still requires a few hours of building even with purchased components. The dollar cost gap is real but modest; the effort gap is where the tiers actually diverge most.
What’s the single best upgrade if I already have a Tier 1 setup?
Adding a small vent fan is generally the highest-value single upgrade from Tier 1 — it improves odor control more than almost any other single change, and it’s a modest, self-contained addition that doesn’t require rebuilding anything else in your setup.
Are there any hidden costs people commonly forget to budget for?
Tubing, caulk, and basic hardware are the most commonly underestimated line items — individually cheap, but easy to forget when tallying up a build budget from memory. Add a small buffer, roughly $15–20, to whatever tier total you’re planning around to cover these incidentals.
Does the cheapest tier work for two people, or only one?
Any tier can technically support two people, but the lower tiers require more frequent emptying and attention with two users than with one — factor this into your tier decision if you’re setting up for a couple rather than solo use, since the practical hassle scales faster at the budget end than it does with a higher-capacity manufactured unit.